Learn how to set macOS screenshots to save directly to the desktop for easy embedding in your adoc Studio technical documents.
Technical Writing with adoc Studio: Embedding Screenshots in Your Documents on macOS
Embedding screenshots in your documents is an essential part of technical writing. When using adoc Studio and macOS, there are a few handy tricks to streamline the process. One common issue is that screenshots may not always be saved to the desktop as expected. In this post, I’ll explain how to adjust the settings so you can seamlessly integrate screenshots into adoc Studio.
1. Taking Screenshots on Mac
On a Mac, you can quickly and easily take screenshots using the following shortcuts:
Command (⌘) + Shift + 3: Captures the entire screen.
Command (⌘) + Shift + 4: Allows you to select a specific area to capture.
Command (⌘) + Shift + 4, then Spacebar: Captures a specific window.
Another tip: If you want to use the screenshot directly, press Command (⌘) + Control (⌃) + Shift + 3 or 4. The screenshot is stored in the clipboard, and you can paste it into a document by pressing Command (⌘) + V. It won't appear in your save location.
 adoc Studio
Organize, Write and Share.
Documentation in AsciiDoc.
Organize, Write and Share.
2. Adjusting the Screenshot Save Location
If you find that your screenshots aren’t being saved to the desktop, it’s likely the save location has been changed. To adjust this setting, follow these steps:
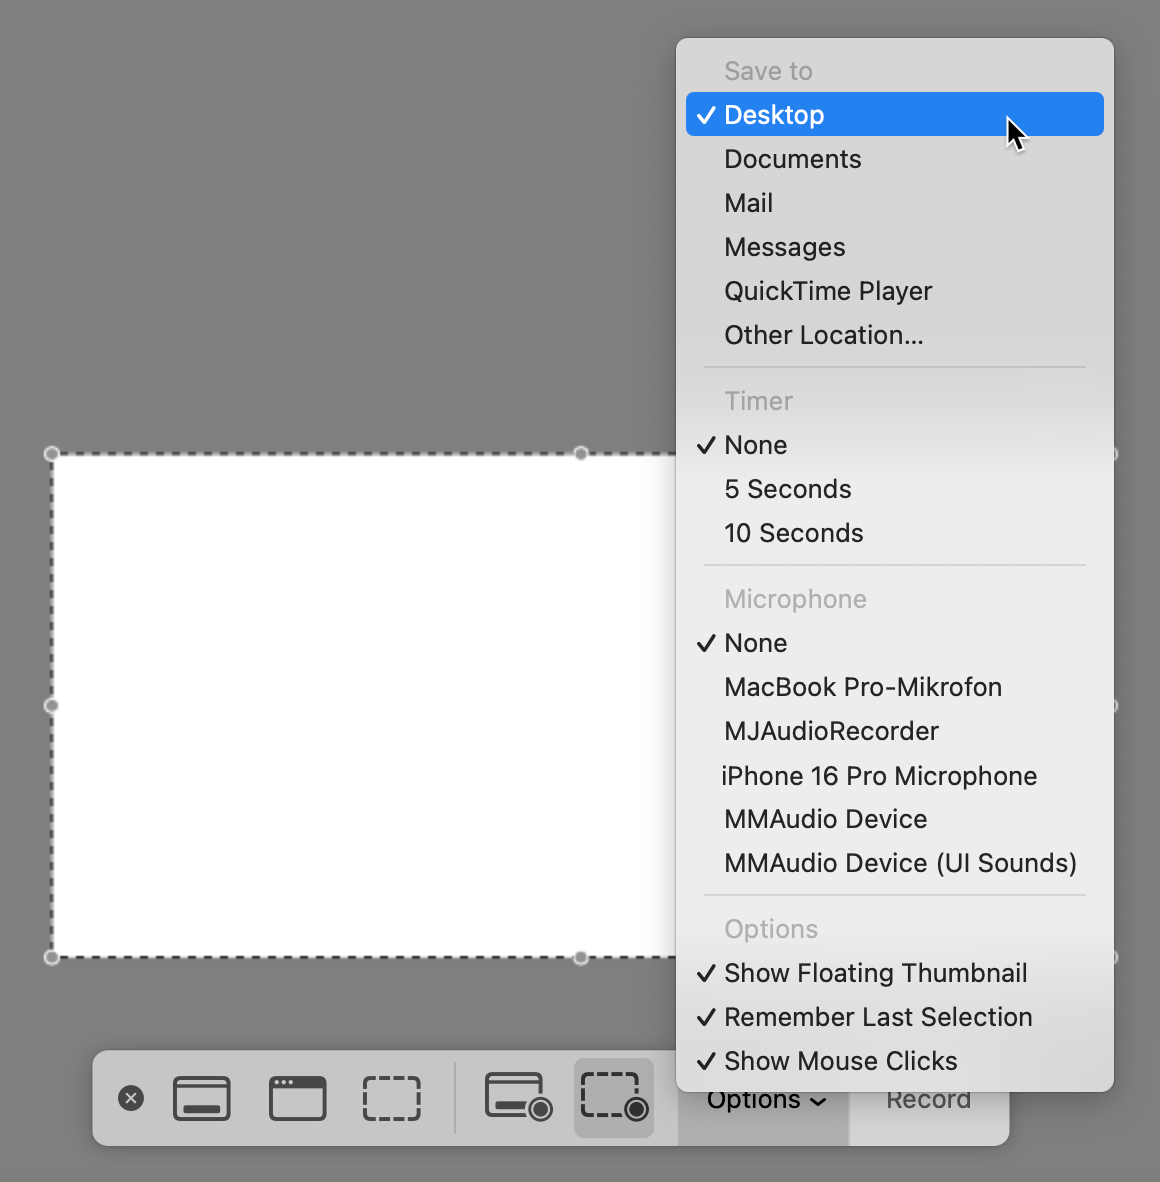
Open the Screenshot Tool: Press Command (⌘) + Shift + 5. The screenshot tool will appear with various capture options.
Change the Save Location: Click on “Options” within the screenshot tool. In the menu, under “Save to,” you can select where your screenshots should be saved. Choose “Desktop” if you want them saved there.
Check the Save Location: If the default options don’t suit you, select “Other Location” to choose a specific folder. Once you set the location, it will remain active for all future screenshots.

3. Embedding Screenshots in adoc Studio
To integrate the captured screenshots into your adoc Studio documents, make sure the images are in an accessible format (PNG or JPEG) and saved in the correct location. After saving the file, use the following AsciiDoc command in your AsciiDoc document:
image::image.png[optional caption, width=600]Replace “image.png” with the actual filename, and your screenshot will seamlessly embed into your adoc document.
Tip: Even faster, simply drag and drop the picture directly into your adoc Studio document where you want it. It will automatically be formatted as an AsciiDoc command.
Conclusion
By adjusting the default save location for screenshots on Mac, you can optimize your workflow for technical writing with adoc Studio. This makes accessing your screenshots easier and embedding images in your documents quick and hassle-free.
You might also like
-
Tip: esc Key on iPad Keyboard
- Antoni Cherif
- Published on
-
The Making of adoc Studio
- Frank Blome
- Published on
-


